


Don’t ghost your growth! Grab the deal before it vanishes- 🎉 New Year Deal! Flat 60% Off
Need Help?
Chat with us on WhatsApp
Chat with us on WhatsApp
Don’t ghost your growth! Grab the deal before it vanishes- 🎉 New Year Deal! Flat 60% Off
Scale Smarter with AI — Christmas Season Off! 🚀 Grab 25% Off Before It’s Gone!
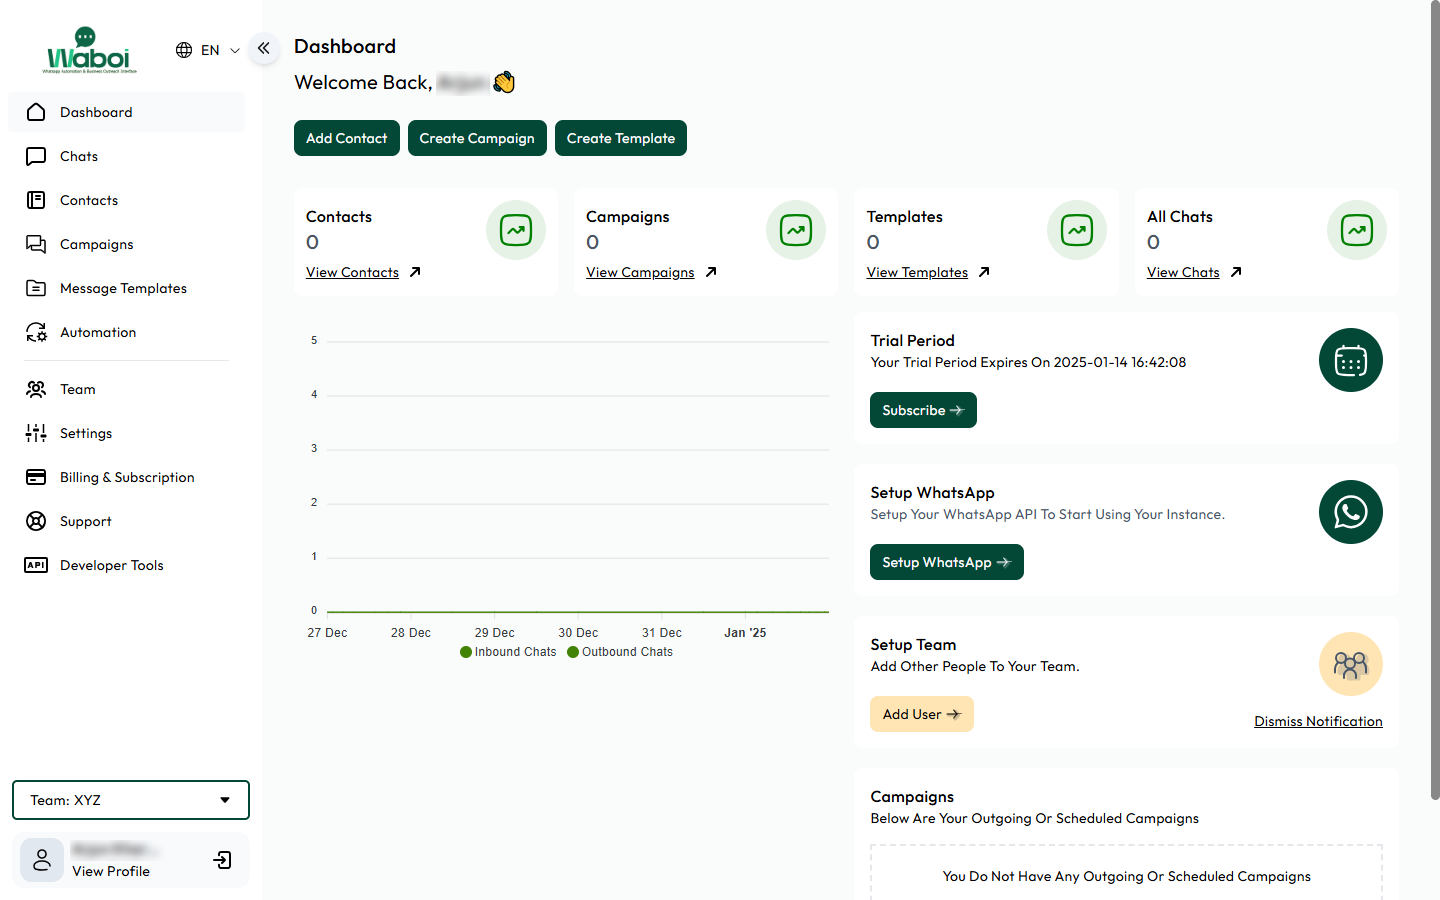
Signup Quickly to access Waboi’s powerful features.
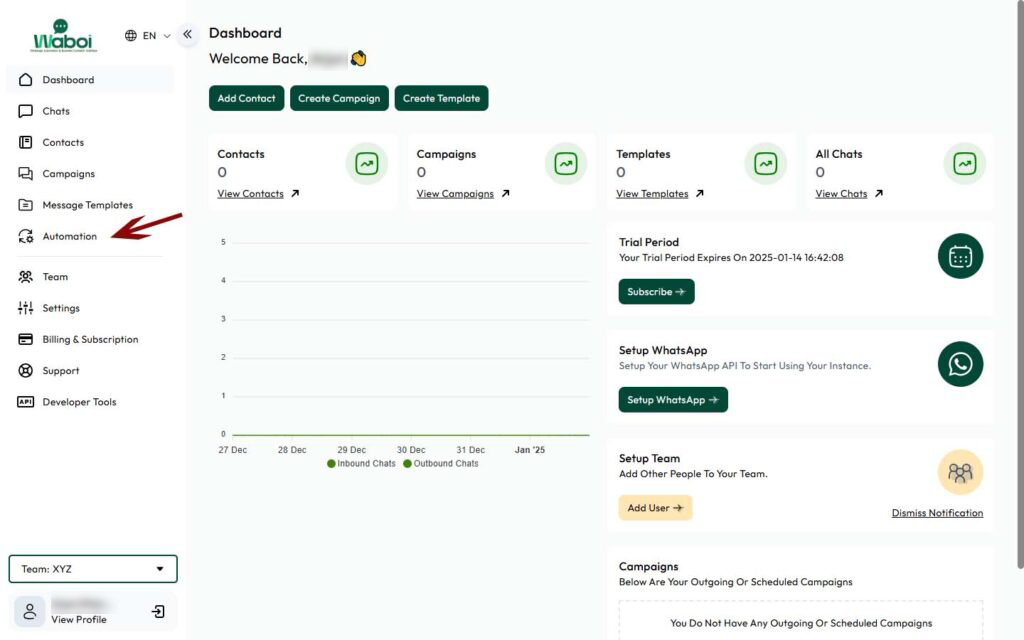
Let’s learn how to create an automation in your Waboi account.
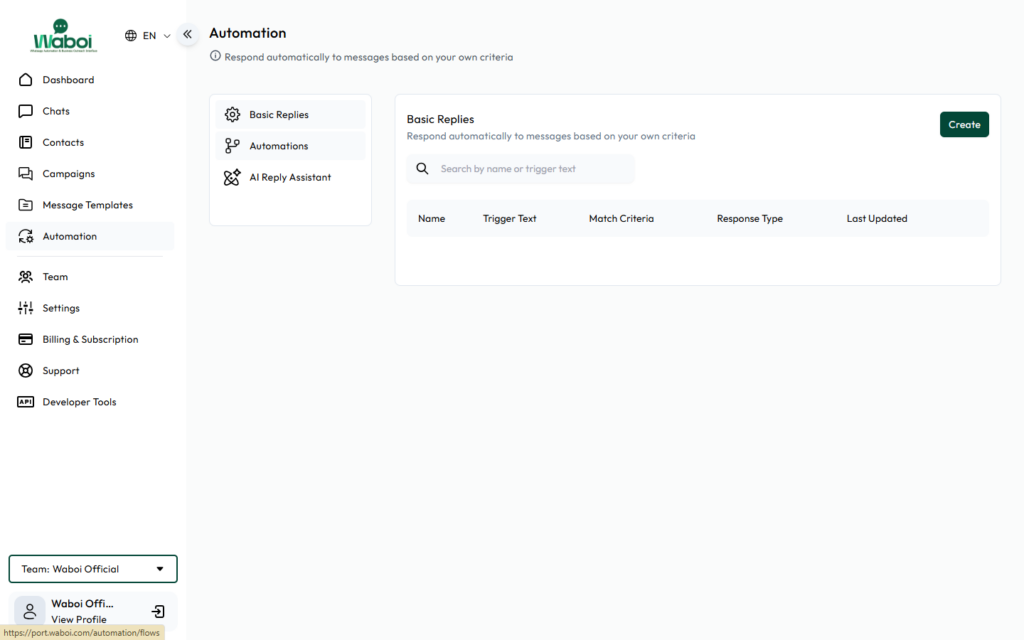
First, log into your account and navigate to the “Automation” section. You will find there are several options. Such as :-
a. Basic Replies
b. Automations
c. AI relpy Assistant.
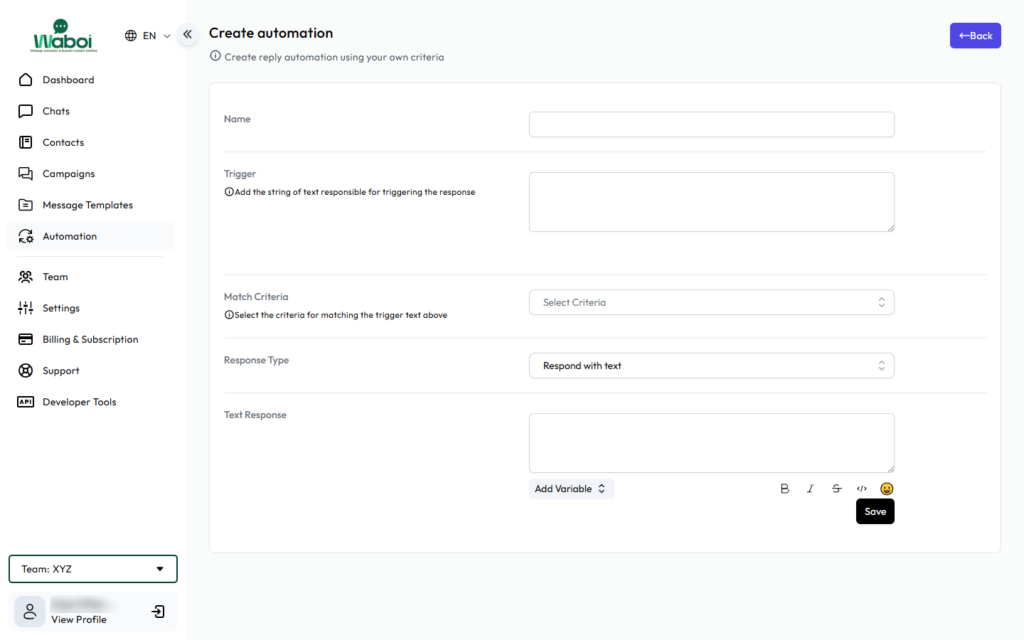
Let’s go with the first one which is “Basic Replies”, click on it and then “Create.” There are a few steps to set everything up, so let me guide you through the process.
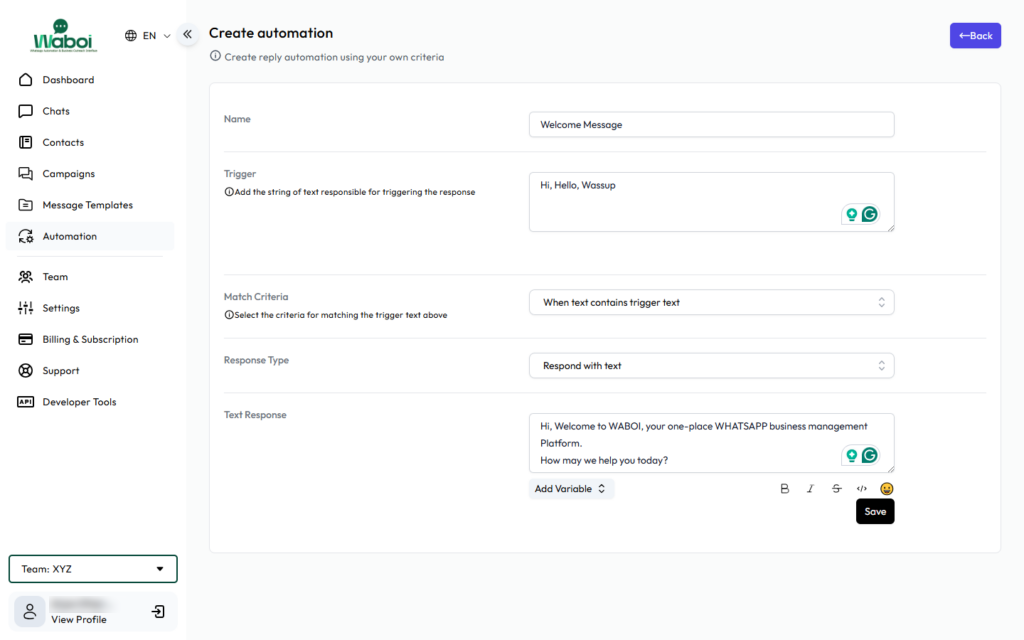
1. NAME: In this field, you should name your automation. Since automation can include various steps like welcome messages, services offered, etc, having clear names will help you identify them for future adjustments.
2. TRIGGER: This section defines what will start your automation. You need to set up a text that will act as the trigger. For example, if you want to create a “Welcome Message Automation,” your trigger text could be greetings like “Hi,” “Hello,” or “What’s up?”
3. MATCH CRITERIA: Here, you’ll find a dropdown with two options:
a. When the text is an exact match to the trigger text.
b. When the text contains the trigger text.
You can select either option based on your preference.
4. RESPONSE TYPE: In this section, you’ll specify how you want to respond once your automation is triggered. You have a few options:
a. Respond with text
b. Respond with an image
c. Respond with audio
Choose one based on how you want to engage with your potential leads. If you select an image response, please note that the supported file formats are JPG and PNG. For audio responses, the supported format is MP3.
If you have any questions or need further clarification, don’t hesitate to ask. To help illustrate this process, I’ve created a “Welcome Message Automation”. Just follow the steps outlined below!
STEP 1
STEP 2
STEP 3
STEP 4
STEP 5
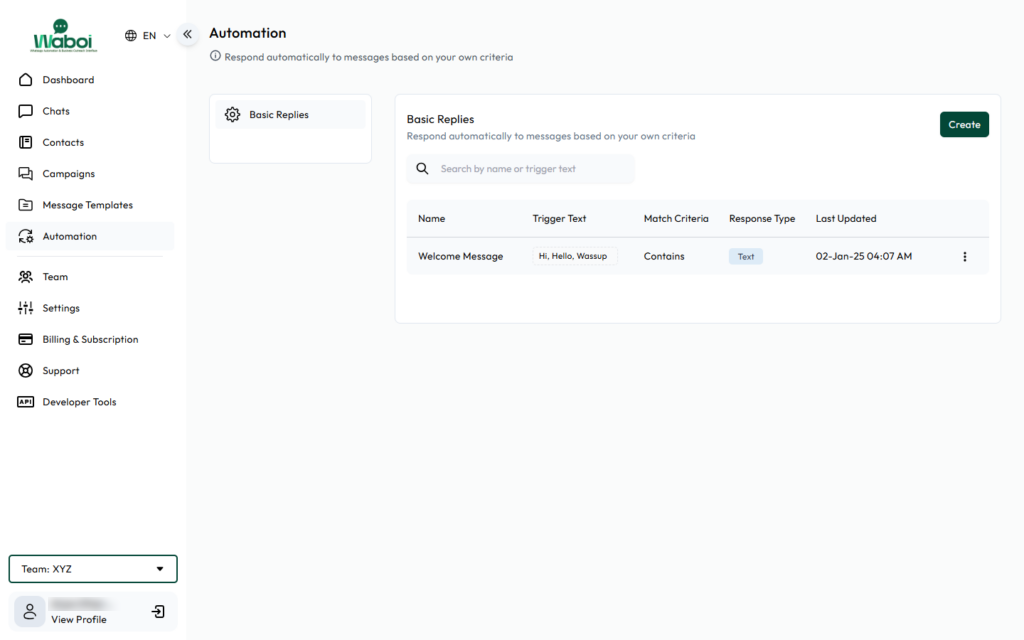
STEP 6 – Once it is saved you can see your automation on the Automation Section Basic Reply.
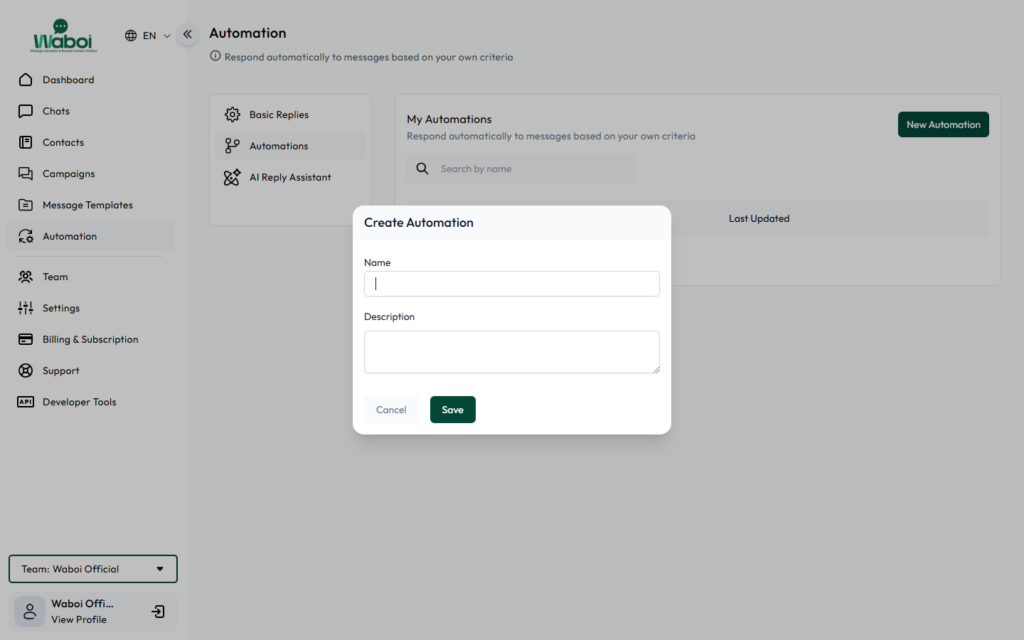
Now, let’s discuss another automation option known as “Automations.”
Click on “New Automation”. A popup will appear with a field asking for “Name” and “Description”. Fill out the name and description of your automation.
STEP 1
STEP 2

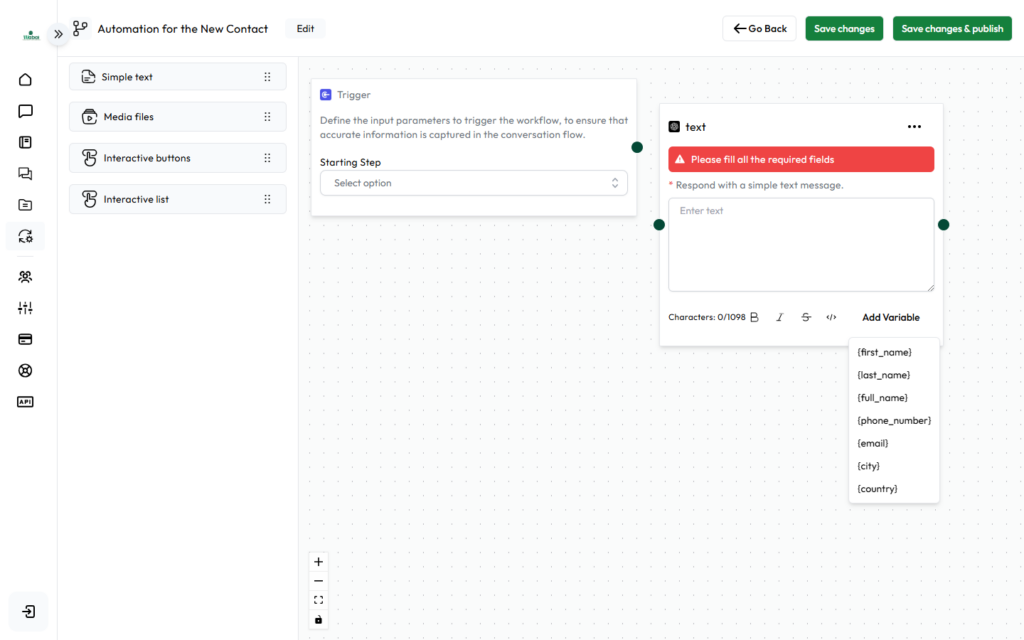
You will land on the flow builder setup where you will create the automation. Now don’t worry about it, it will be very exciting and fun.
Let’s jump to it.
You can see a few options on the left-hand side which you drag and drop to build the Automation in the flow builder. They are –
a. Simple text
b. Media Files
c. Interactive buttons
d. Interactive List
Let’s go all of them one by one.
a. Simple Text-This is a straightforward text-based option that allows you to set responses using a simple text message. You can also add variables by clicking on “Add Variable.” Variables can include First Name, Last Name, Email, Phone, and more.
Reference Image has been shared below
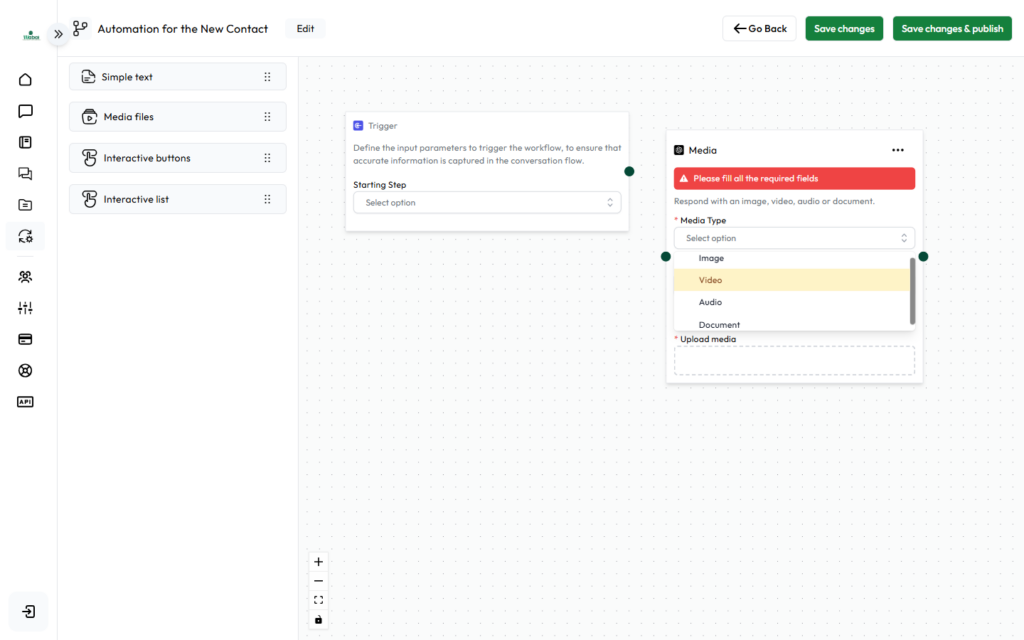
Next, we have “Media files”.
In Media files you select media such as Image, Video, Audio or Document. The supported format for the Image file is JPG and PNG.
For Video it is MP4 or 3gp, Audio format is MP3, AAC, AMR and lastly for Doc the supported format is PDF, XLS, TXT, DOC, and PPT.
Simply select the media suited for your automation.
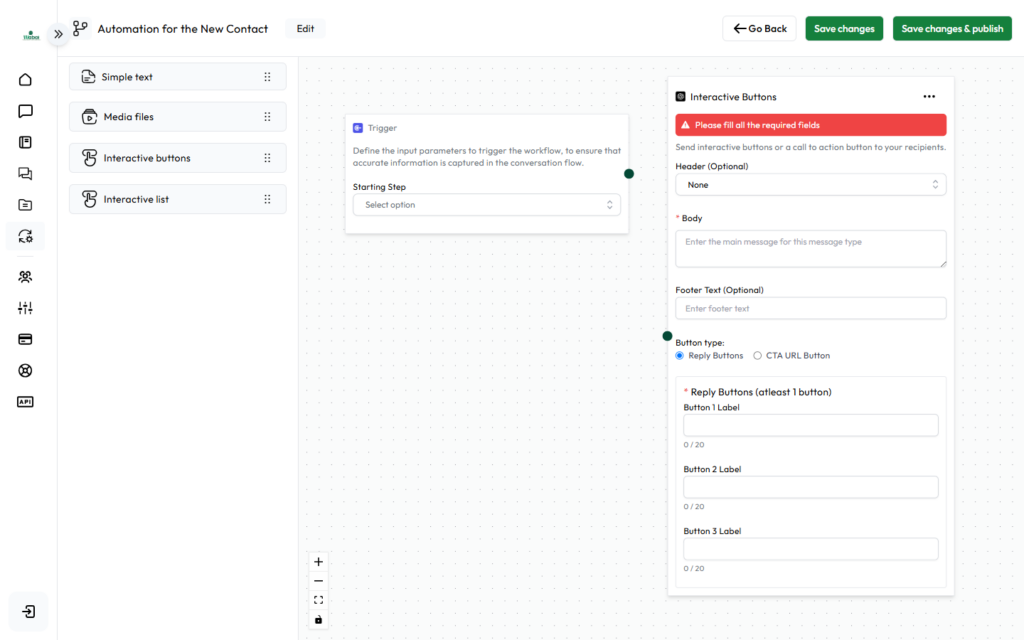
Third is Interactive Buttons. With interactive buttons you can make the automation more participative and create a funnel that will help in lead conversion.
You will have a Header, Body, Footer, Reply buttons and a URL CTA.
Header and Footer are optional. In Header you have the option to keep the header as Text, Image, Video, Audio, and Document Based. This is similar to what we have covered in Basic Replies. You can select the header based on your message preference.
In the body your main message will be there this will be text-based.
Finally for the Reply Buttons who have options to keep three buttons and for URL CTA you will have one one button option where you will asked for the button name and the URL link.
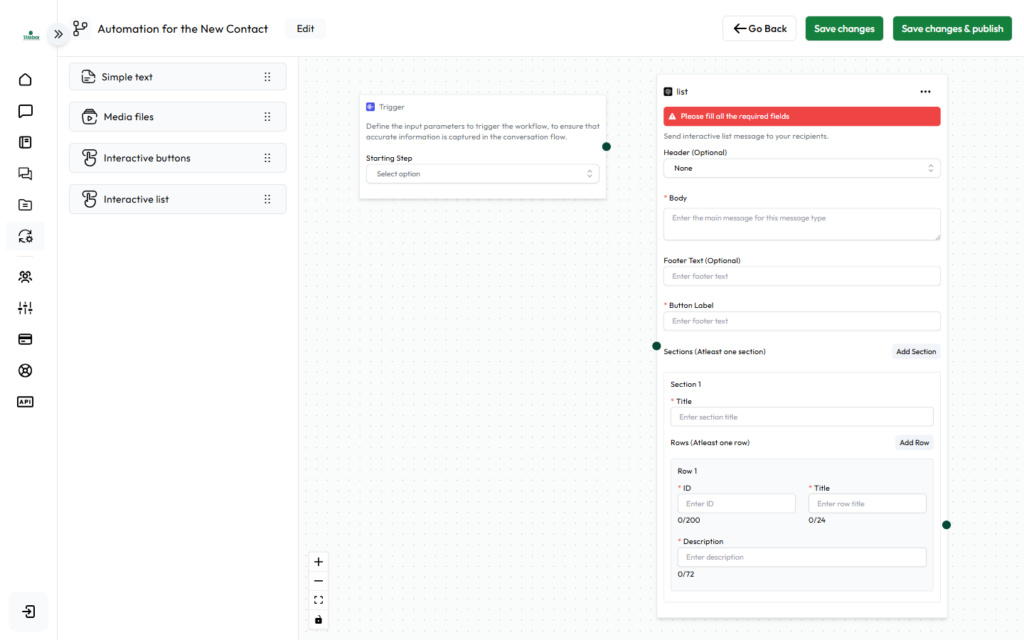
Interactive List – Now this is useful for a business that has multiple services. Let’s take an example of a restaurant business.
They have multiple items. With an interactive list, they can list out their services easily.
The Header, Footer, and Body fields are the same as the interactive button. Then you have the Button Label.
You can customize the button label to display based on your preference. For our restaurant example, we can set it up as menu items. Following that, you will have sections and rows available. You can add a maximum of 10 sections and 10 rows according to your needs.
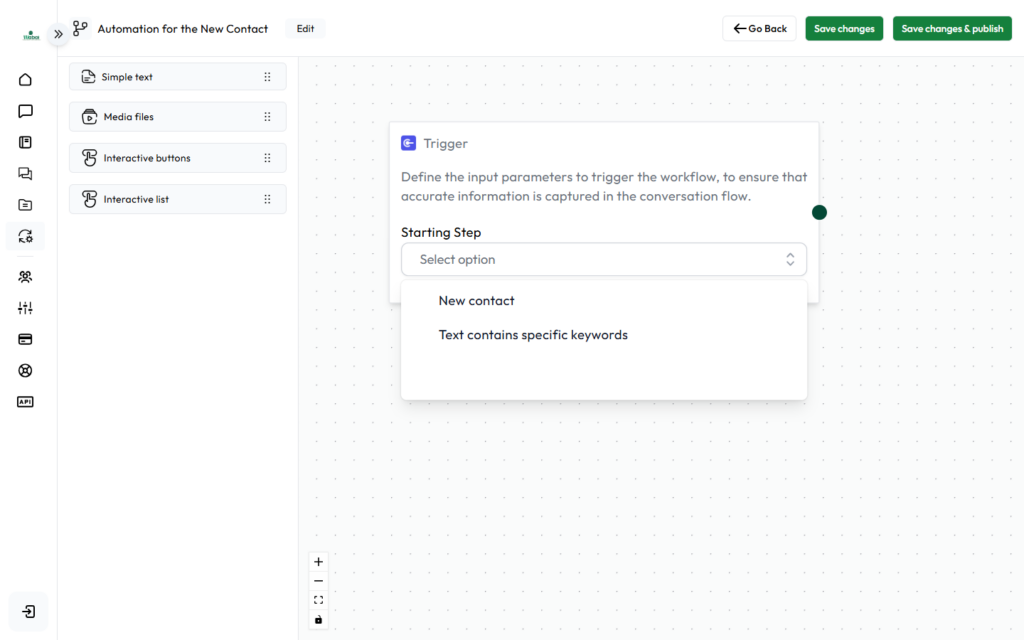
One final point is the “Trigger” feature, which has two options. The first option is “New Contact,” meaning that whenever a new contact is added to your WhatsApp Automation Interface, the automation will be triggered.
The second option allows you to set triggers based on specific keywords in text messages, such as “Hi,” “Hello,” or “Hey There.”
Create your Waboi account and get started in minutes.
Set up WhatsApp to start automating messages with ease.
Learn how to configure webhooks for seamless integrations.
Quickly configure payments to manage transactions efficiently.
Create and launch campaigns with this simple setup guide.
Design effective message templates in just a few steps.
Build custom automation flows to streamline messaging.
Add and onboard team members to collaborate effortlessly.
Verify your Meta Business to unlock full access to features
Waboi is a WhatsApp marketing and automation platform that streamlines communication, boosts sales, and enhances customer engagement.
It allows you to send bulk personalized messages to your customers directly on WhatsApp, ensuring high engagement rates. Using your own Whatsapp Business API.
Yes, Waboi’s Automate with Flows and AI Replies features let you handle customer interactions automatically and efficiently. OpenAI API Tokens would be required to Integrate for Automated AI Chat Replies.
Absolutely! Waboi integrates with almost all platforms like Shopify, Google Sheets, HubSpot, and more for seamless workflows using our webhooks.
We only take the subscription fee to use our platform and its features. The Cost to broadcast per message etc are all managed by Meta/Whatsapp Platform. Only pay for what you use with WhatsApp conversation charges based on customer interactions. Fees vary by country, as determined by Meta. Unlike competitors who add a 20-25% markup on Meta's WhatsApp API pricing, we charge no extra fees.
Yes, Waboi offers scalable solutions tailored to businesses of all sizes, from startups to enterprises. Starting from Just $14 the lowest compared to others.
It helps you reach customers with higher read rates, automate repetitive tasks, improve response times, and drive more sales.
Not at all! Waboi is user-friendly and requires no coding skills for setup or operation. And if you get stuck we are always here to help.
We offer 24/7 live support to assist you anytime, ensuring uninterrupted service and quick resolutions.
Yes, you can invite teammates, assign roles, and collaborate efficiently to manage your operations.
Share your details and get a consultant to help you with Waboi & unlock special deals.